
Upgrade selection is explained from 9:58. The observed menu at 10:17 supports the labels shown; exact build and platform-wide bindings are unknown.
Star Wars HQ · Source / open if playback failsUse this Star Wars Galactic Racer guide to approach your first Tour as a survival challenge: choose a vehicle you can control, read the next events, manage your boost heat, and spend available Tuning Points before committing to another attempt.
On this page
Star Wars Galactic Racer guide: your first Tour
The campaign uses Tours rather than a simple sequence of races that you can treat independently. IGN describes a branching event map and a League Token that keeps an attempt alive; losing it ends that Tour. Look ahead before choosing a node, because the next event changes what your vehicle needs to do. The immediate goal is to reach the next stage with a working build, rather than risk the whole attempt for a single spectacular finish.
Kotaku emphasizes survival over chasing every win, while also noting that some events demand a successful result to continue. This is a useful distinction: surviving a standard race and meeting an eliminator requirement are different objectives. Read the event panel before entering and use that requirement as your target. Do not assume a low finish is acceptable in every event.
Choose a vehicle for the handling you need
The supplied IGN and Kotaku guides describe the Landspeeder as a balanced, defensive choice, the Speeder Bike as a nimble option with a boost after drifting, and the Skim Speeder as a wider vehicle suited to straights and contact. Those descriptions suggest different starting priorities, rather than a universal best vehicle. If corners are where your attempts fall apart, prioritize learning a manageable turning rhythm before chasing straight-line speed. Treat a vehicle change as a way to test a different driving style, not a guarantee of an easier Tour.
IGN reports that the campaign initially offers the Landspeeder, with Tuning Points used to unlock other vehicle types and buy permanent upgrades. A vehicle named in a guide is therefore not necessarily selectable on your first attempt. Check your actual selection screen and distinguish an unavailable class from an unlocked one. Podracing is not the sole focus of Tour mode, so do not assume every campaign race uses a podracer.
Read the route and the event requirement
| Event | What to read before entering |
|---|---|
| Standard race | Its actual placement and continuation requirement |
| Eliminator | Who is removed and which finishes complete the event |
| Test Flight | The specific solo challenge rather than an ordinary race goal |
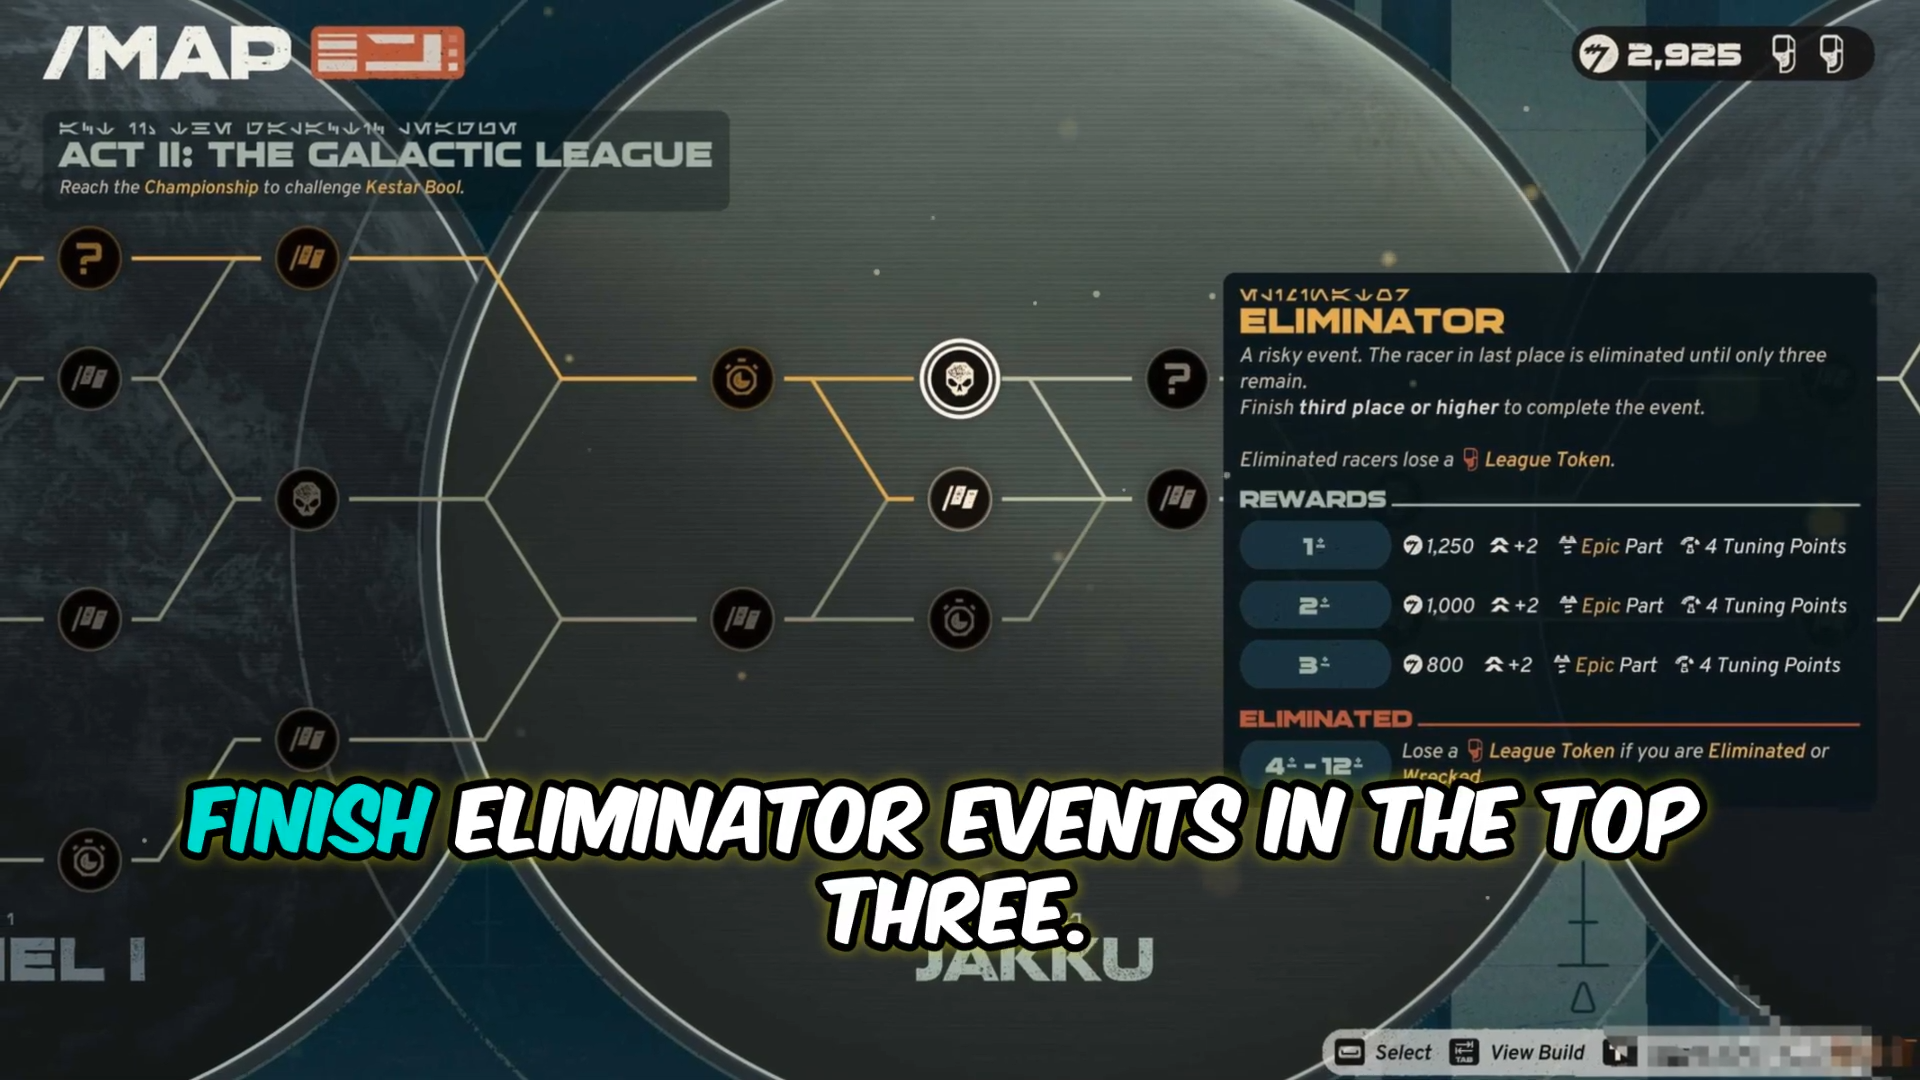
The shown event requires third or higher and lists its rewards. Captured at 0:24; it is one event example.
AlphaZin · Source / open if playback failsSeparate Afterburner from Ramjet
Afterburner and Ramjet are different boost systems in the supplied guides. Afterburner recharges during racing, whereas Ramjet needs attention to heat and cannot be treated as a harmless button to hold indefinitely. IGN describes damage and system penalties from overheating; Kotaku also warns about an overheated Ramjet destroying the vehicle. Learn the warning cues before building your driving around long bursts.
Use the safest stretch you understand to learn how the systems respond, then adjust as you become familiar with the course. Both sources discuss environmental cooling, but a general observation does not tell you exactly how long you can boost on a particular section. Watch your own heat display instead of using an invented temperature threshold. A guide recommendation to stay fast is not permission to ignore the warning state.
Use abilities as part of a coherent build
Abilities and parts give a Tour build more than a simple speed rating. IGN describes active and crash-triggered abilities, while Kotaku discusses battery charges and choosing upgrades that complement the abilities actually equipped. Before taking a reward, ask what action it improves in your current build. An upgrade that supports an ability you are using has a clearer purpose than a reward chosen only because its label sounds powerful.
The supplied sources include different examples of shield use, boost-focused setups and battery investment. They do not prove one configuration is best for every vehicle, course and player. Choose a clear goal such as surviving contact or maintaining controllable speed, then judge the next reward against it. Keep precise damage limits, universal button bindings and hidden effectiveness claims out of that decision.
Practice without treating every run as a final attempt
Kotaku recommends Arcade and Scenarios as places to become familiar with courses outside the campaign Tour. Use those modes to learn a corner or compare a route when you are struggling to make progress. A shortcut is only useful if you can take it consistently enough for the current situation. The supplied material does not establish an exact time saving or a complete shortcut list.
After a failed attempt, identify whether the recurring problem was the route, vehicle handling, boost heat or an upgrade choice. That is a general review method grounded in the hazards and choices described by the guides. Change one decision you can evaluate on the next run, rather than assuming every failure requires a completely new build. More experience helps you recognize the event ahead; it does not eliminate the Tour failure conditions.
Check permanent upgrades before the next Tour
Tuning Points are described by IGN as the currency for vehicle unlocks and permanent upgrades. In Star Wars HQ’s supplied video, the author calls attention to the upgrade option before starting another Tour; the captured screen shows an Upgrade Vehicle panel with stat rows. Check that panel while you are still making your vehicle selection. Do not confuse this spending with the Credits and random parts used during an ongoing attempt.
The captured Skim Speeder menu highlights Cornering and describes it as how quickly and tightly the vehicle can take corners. That makes the menu a useful place to review a weakness you noticed in the previous attempt. It is not proof that the displayed vehicle speed, balance or investment is the correct target for your build. For the spending process and the persistence boundary, use the dedicated guides below.
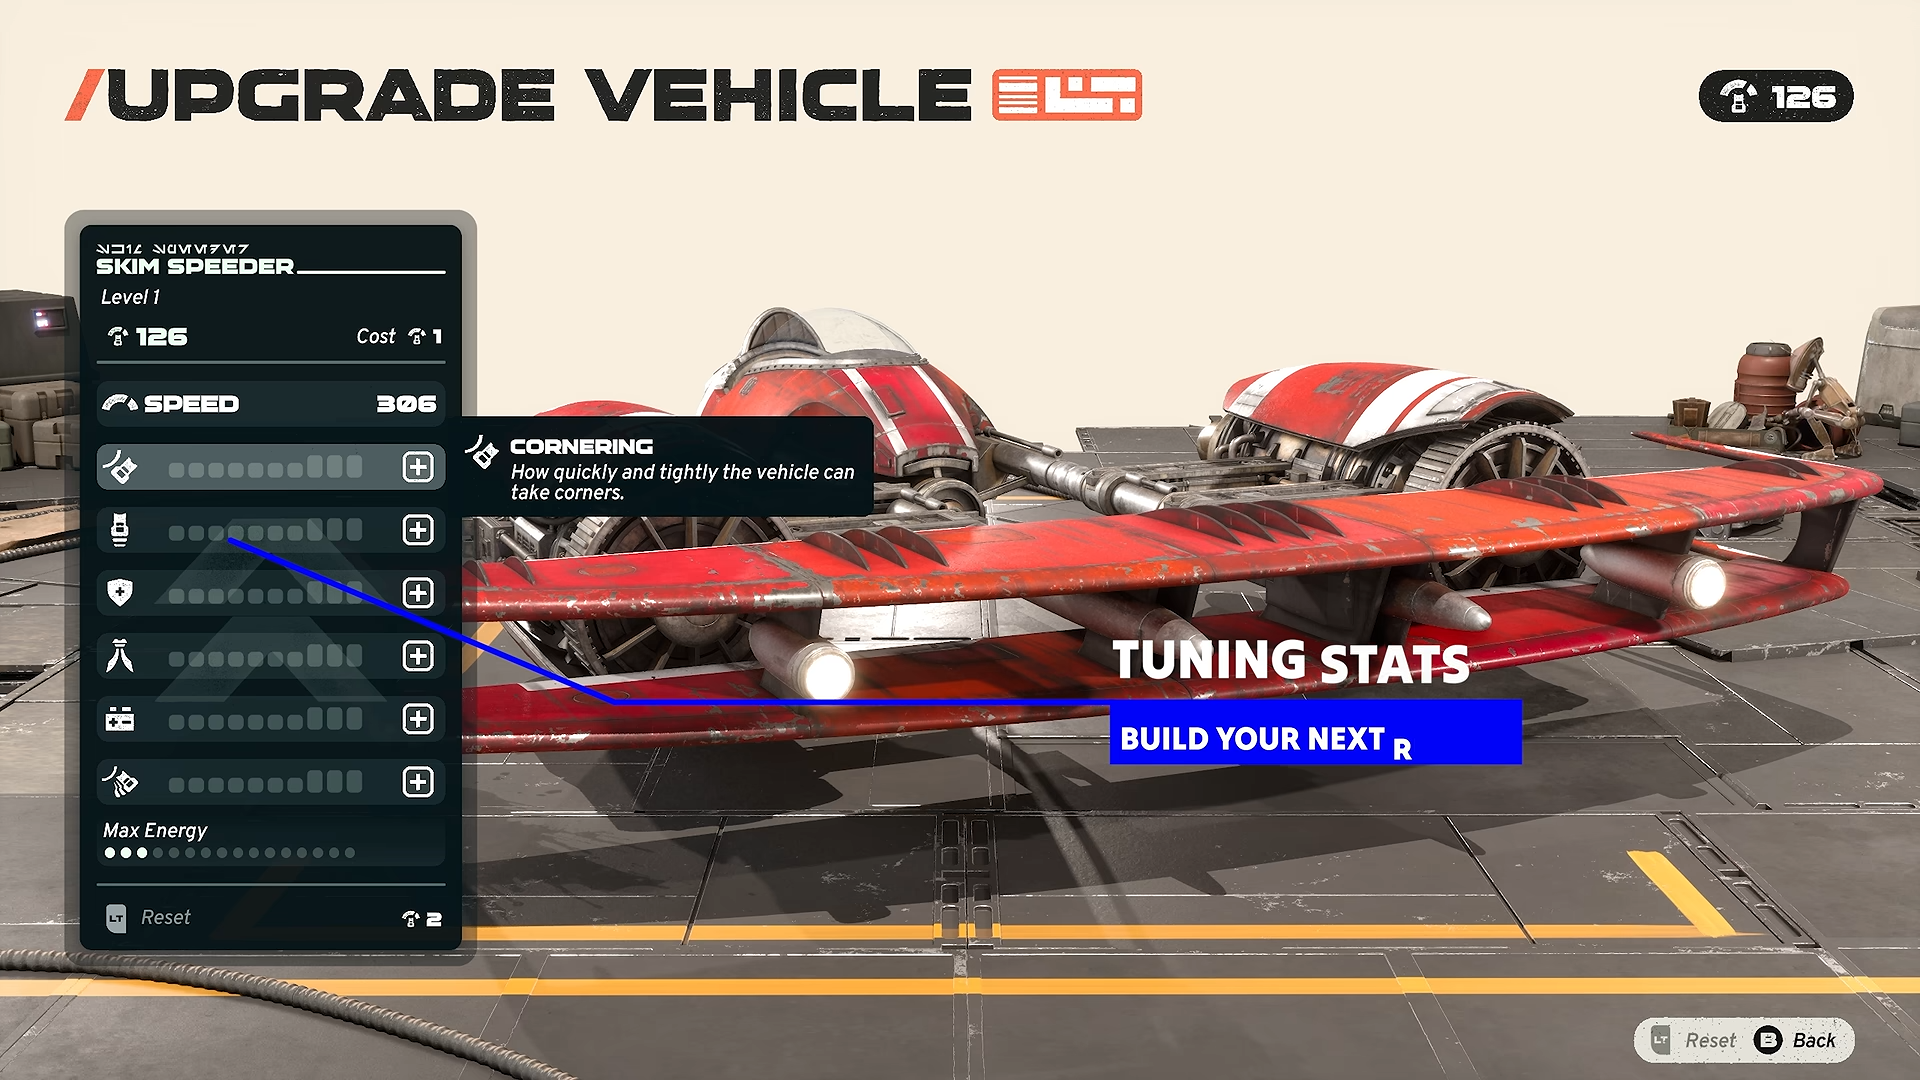
Cornering is described as how quickly and tightly the vehicle takes corners. Captured at 10:17; displayed values are this vehicle sample.
Star Wars HQ · Source / open if playback failsVersion and platform boundaries
These instructions describe the reviewed footage and supplied guides. The footage does not identify its exact build, and controller prompts can differ between platforms or bindings. Follow the labels in your own menu rather than copying a button from the video. Costs, rewards and multiplayer behavior outside the shown examples remain Not confirmed.