
An eliminator reward example appears at 0:24; the upgrade and reset examples appear at 1:12 and 1:22. Other narrated payouts remain unconfirmed.
AlphaZin · Source / open if playback failsStar Wars Galactic Racer Tuning Points are used for vehicle unlocks and permanent upgrades. Spend them from the vehicle selection and upgrade menus before a new Tour. The captured eliminator example awards four points for qualifying finishes; other reward amounts need separate confirmation rather than being treated as universal rules.
On this page
Star Wars Galactic Racer tuning points: what they buy
IGN identifies Tuning Points as the currency used to unlock additional vehicle types and buy permanent upgrades. That separates them from Credits spent during a Tour and Kit Points described as cosmetic currency. Start by identifying the currency icon and purchase menu before choosing an upgrade. A large Credits balance is not evidence that you can buy a Tuning Points upgrade with it.
The supplied videos describe Tuning Points investment as lasting across attempts. That makes the selection phase between Tours important: it is a chance to improve the baseline vehicle before assembling another temporary build. The exact upgrade cost depends on the displayed menu in the reviewed examples, so there is no verified universal cost per stat point here. Read the current price rather than applying a number taken from another author’s vehicle.
Earn points by checking the event reward panel
| Reward claim | Evidence boundary | Evidence |
|---|---|---|
| Four points for qualifying finishes in the shown eliminator | Panel lists the payout and a third-or-higher completion condition | AlphaZin: How to get, reset, spend & respec tuning points in Star Wars Galactic Racer · 0:24 |
| Standard race and Scenario payout amounts | Narrated amounts; not confirmed by the captured event panels | AlphaZin: How to get, reset, spend & respec tuning points in Star Wars Galactic Racer · 0:29 |
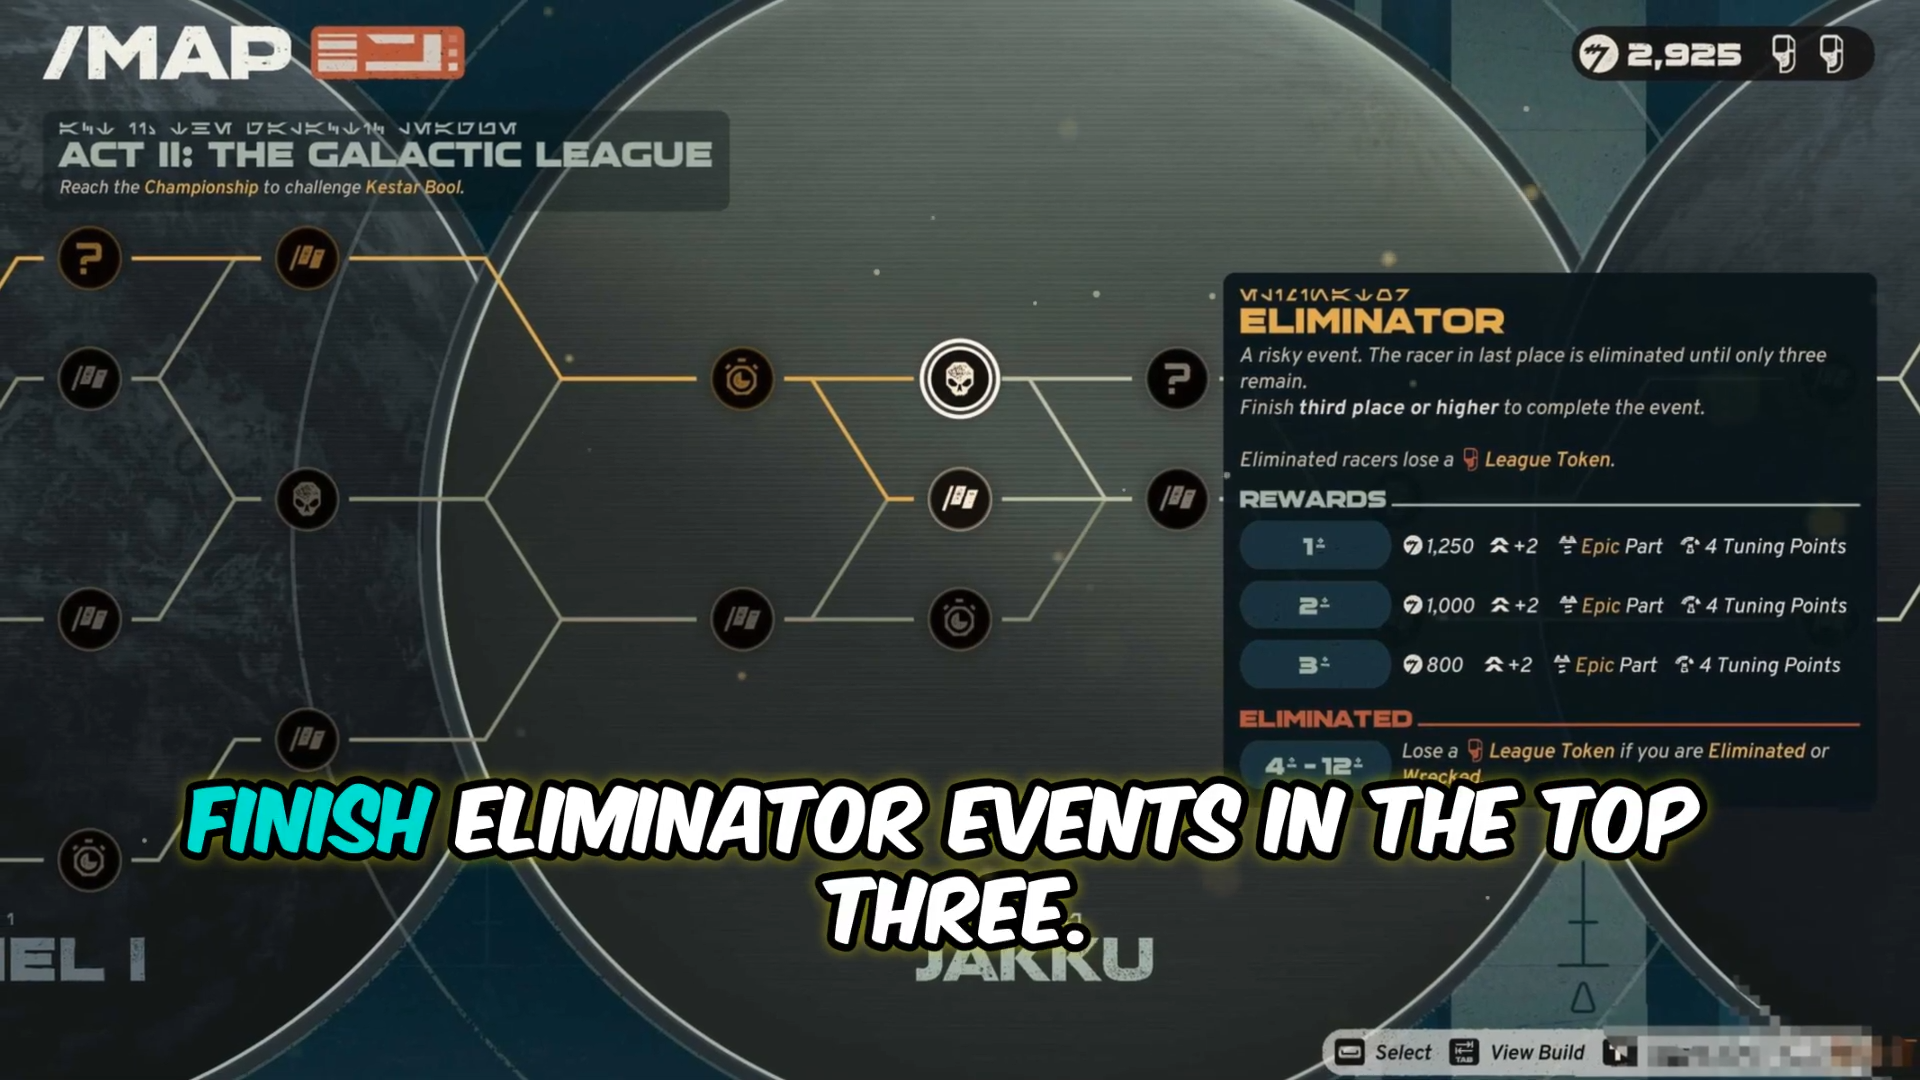
Captured at 0:24. The top-three reward rows support this event example, not an all-mode payout rule.
AlphaZin · Source / open if playback failsOpen the vehicle upgrade menu before the next Tour
Stay at vehicle selection
Review the upgrade option before starting the next Tour.
Open Upgrade Vehicle
Follow the prompt visible in your own menu, rather than assuming a universal controller binding.
Read the selected row and price
Choose an investment whose displayed effect matches the problem you want to improve.
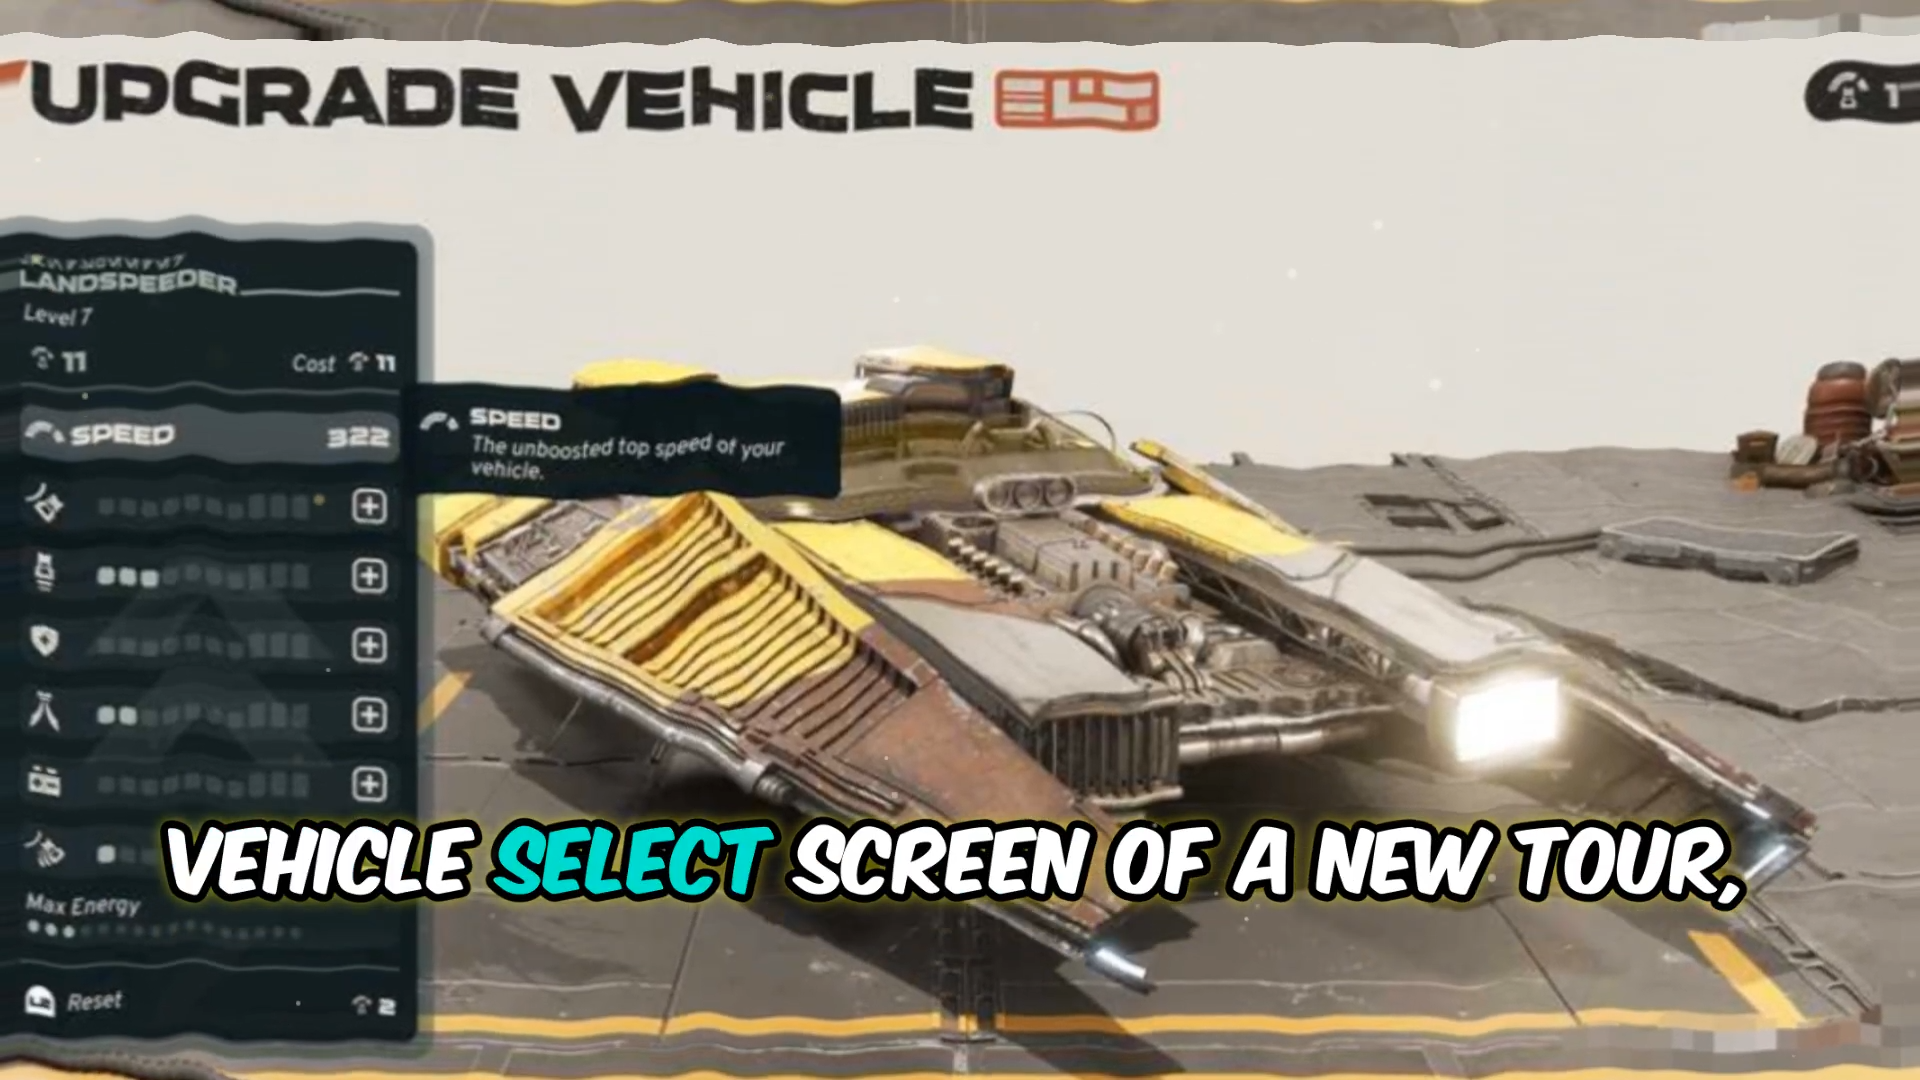
Captured at 1:12. The Speed tooltip describes unboosted top speed; exact build and upgrade scaling are unknown.
AlphaZin · Source / open if playback failsRead the reset cost before changing your allocation
The captured reset prompt shows a cost of two Tuning Points. The narrator says resetting returns the previously invested points so they can be assigned elsewhere. Keep those two pieces of evidence separate: the prompt and its cost are visible, whereas the completed refund is described rather than demonstrated in these frames. Do not treat the screenshot as a before-and-after balance test.
If you want to reallocate, check the current reset prompt and determine where the returned investment would go before confirming. This is a decision aid based on the reset feature shown in the menu, not a verified platform-wide button guide. The supplied footage shows different controller contexts, so a button named by one narrator should not replace the live prompt. Whether the cost or refund rules differ in other builds is Not confirmed.
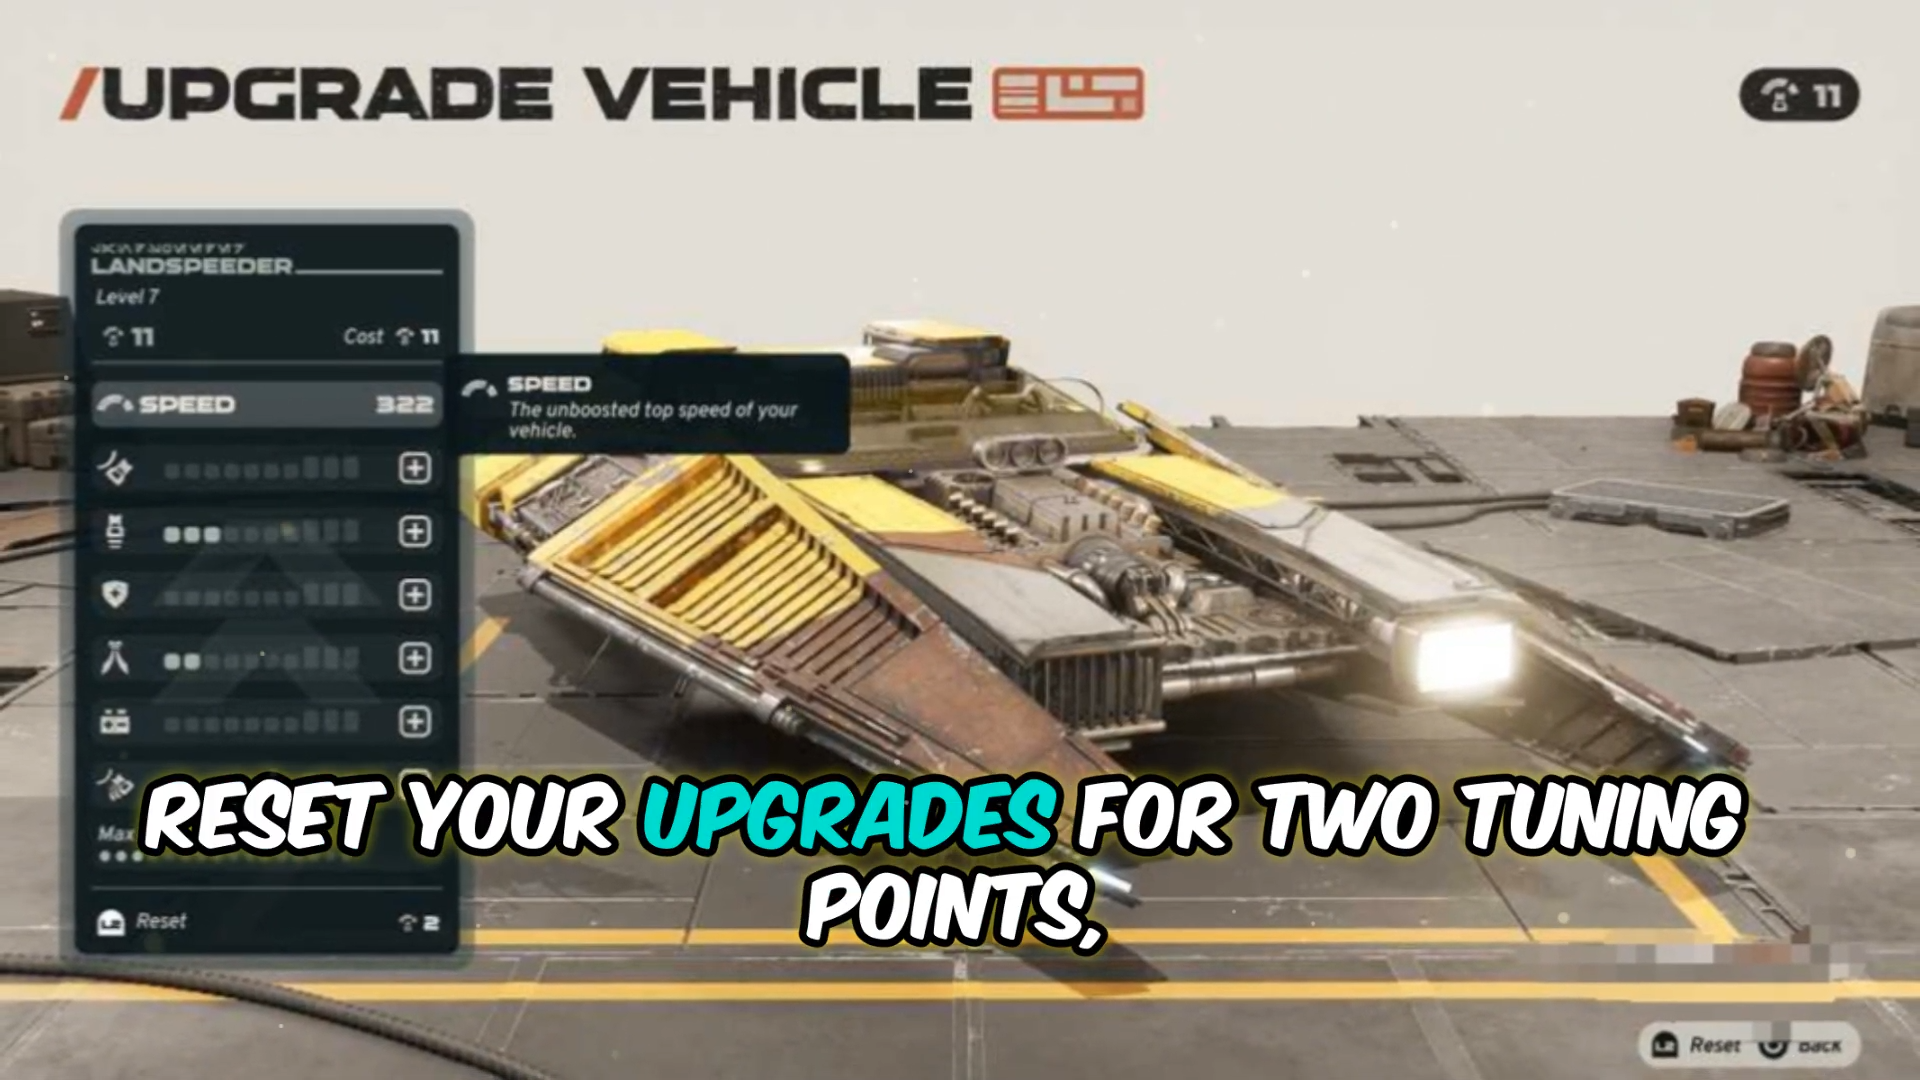
Captured at 1:22. The prompt shows the cost; the completed refund is narrated rather than observed.
AlphaZin · Source / open if playback failsUse points to address a specific driving problem
The videos and written guides discuss several areas of vehicle performance, including turning, boost behavior and resilience. A useful first decision is to name the recurring problem from your previous attempt before choosing a row. For example, the Cornering description is relevant to struggling with turns; it does not prove that turning should always take priority over every other stat. This recommendation follows the visible label and keeps the outcome conditional.
Permanent investment and in-Tour rewards also serve different time horizons. Spend Tuning Points to adjust the baseline you take into future attempts, then use event rewards and Credits to shape the current run. That distinction can make your choices easier to evaluate without inventing an exact optimal build. See the permanent-upgrades page if you are trying to work out what should still be present after the Tour ends.
Limits, earning rates and multiplayer: Not confirmed
The reviewed material does not prove a maximum Tuning Points balance, a complete set of upgrade caps or the fastest earning route. The supplied Reddit thread asks about multiplayer and includes a tentative reply, rather than a verified transfer rule. Do not assume a campaign investment changes online performance simply because the same vehicle appears in both modes. Reward comparisons need matching difficulty, version and completion conditions before they can support a farming recommendation.
These instructions describe the reviewed footage and supplied guides. The footage does not identify its exact build, and controller prompts can differ between platforms or bindings. Follow the labels in your own menu rather than copying a button from the video. Costs, rewards and multiplayer behavior outside the shown examples remain Not confirmed.
Make the next Tour a deliberate choice
Before starting, identify the upgrade panel, review your available investment and read the next event’s requirements. A reward opportunity is only useful if you can meet its completion condition without overlooking the Tour’s failure rules. The beginner guide connects these checks to vehicle handling and boost management. Keep your route choice and long-term spending as related decisions, rather than treating a single reward amount as the whole strategy.